Outlook
From Wiki CEINGE
(Difference between revisions)
| Revision as of 09:03, 27 June 2007 (edit) Vittorio (Talk | contribs) (New page: Image:logo_outlook) ← Previous diff |
Current revision (09:24, 27 June 2007) (edit) (undo) Vittorio (Talk | contribs) |
||
| (8 intermediate revisions not shown.) | |||
| Line 1: | Line 1: | ||
| - | [[Image:logo_outlook]] | + | [[Image:logo_outlook.jpg]] |
| + | #Start Microsoft Outlook | ||
| + | #On the '''Tools''' menu, click '''E-mail Accounts.''' | ||
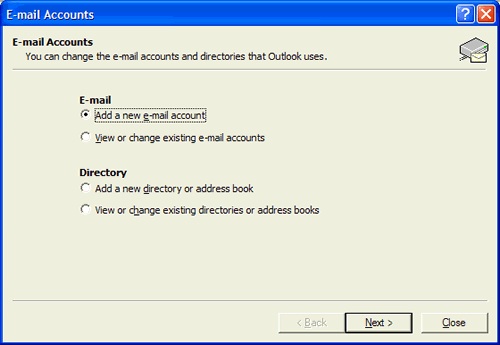
| + | #Click '''Add a new e-mail account''' and then click '''Next.''' <br>[[Image:xp_01.jpg]] | ||
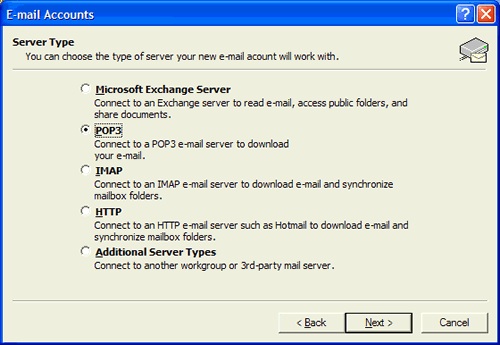
| + | #For server type, click '''POP3''' or '''IMAP''' and then click '''Next.''' <br>[[Image:xp_02.jpg]] | ||
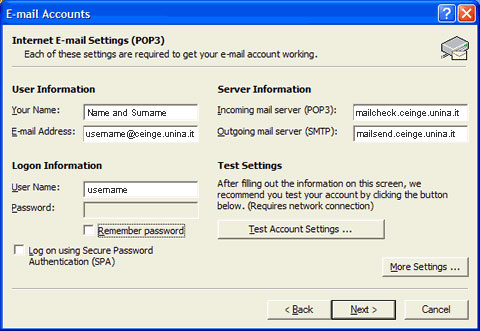
| + | #Enter the following settings: <br> - '''Your Name:''' Name and Surname <br> - '''E-mail Address:''' your CEINGE email address <br> - '''User Name:''' your username <br> - '''Password:''' leave blank <br> - '''Remember Password:''' unchecked <br> - '''Log on using Secure Password Authentication (SPA):''' unchecked <br> - '''Incoming server (POP3):''' mailcheck.ceinge.unina.it <br> - '''Outgoing mail server (SMTP):''' mailsend.ceinge.unina.it <br> [[Image:oxp_smtp_06.jpg]] | ||
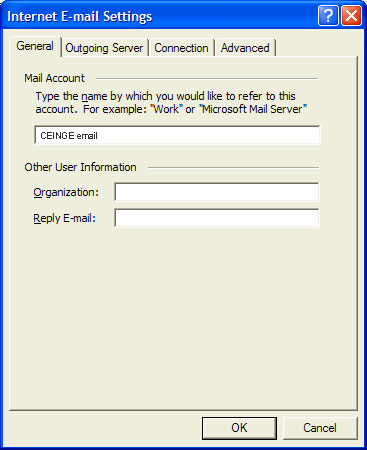
| + | #Click the '''More Settings''' button. | ||
| + | #With the '''General''' tab selected, enter a name for your mail account, such as CEINGE Email. Otherwise, the mail account name defaults to the incoming server name, which is localhost. Click '''OK.''' <br> [[Image:oxp_004.jpg]] | ||
Current revision

- Start Microsoft Outlook
- On the Tools menu, click E-mail Accounts.
- Click Add a new e-mail account and then click Next.
- For server type, click POP3 or IMAP and then click Next.
- Enter the following settings:
- Your Name: Name and Surname
- E-mail Address: your CEINGE email address
- User Name: your username
- Password: leave blank
- Remember Password: unchecked
- Log on using Secure Password Authentication (SPA): unchecked
- Incoming server (POP3): mailcheck.ceinge.unina.it
- Outgoing mail server (SMTP): mailsend.ceinge.unina.it
- Click the More Settings button.
- With the General tab selected, enter a name for your mail account, such as CEINGE Email. Otherwise, the mail account name defaults to the incoming server name, which is localhost. Click OK.